Recognition Protocol
Jump to navigation
Jump to search
Recognition Protocol is a module designed to display recognized license plates (events) information and their management.
Recognition Protocol object creation
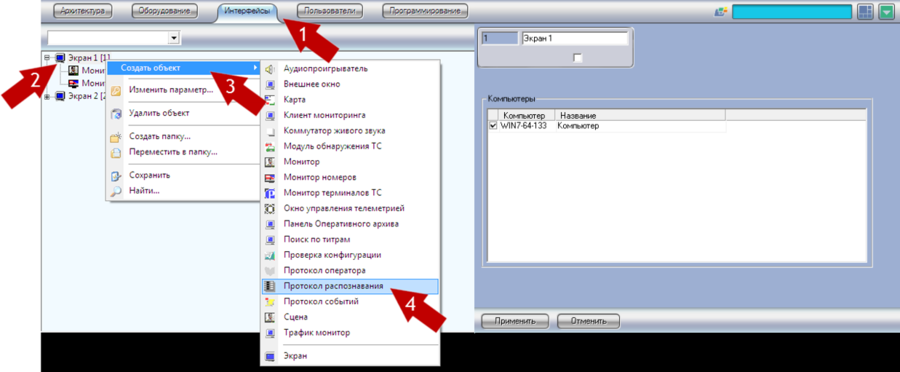
Perform the following actions successively to create Recognition Protocol object in Intellect system (See pic. Recognition Protocol. Recognition Protocol object creation):
- Open Interfaces tab in System settings dialogue window;
- Click on Screen object with right mouse button;
- Select Create object in an appeared menu;
- Select Recognition Protocol in an opened list of available objects;
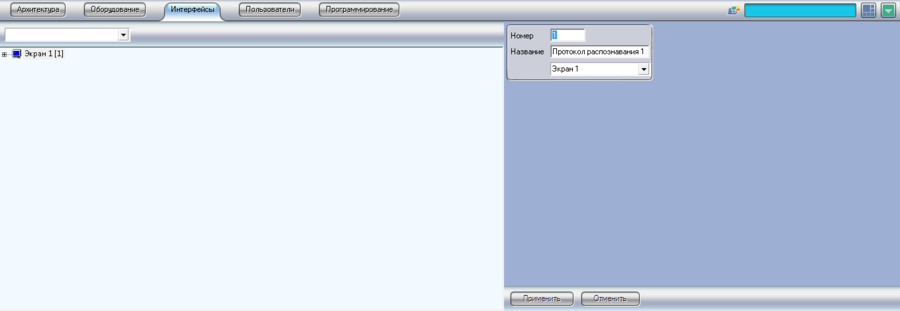
- If needed, change number and the name of object being created and select Screen that should display the Recognition Protocol being created, in the right part of settings window (See pic. Recognition Protocol. Recognition Protocolobject creation settings window);
- Click Apply.
Recognition Protocol object settings
Perform the following actions to set up Recognition Protocol object:
- Open Interfaces tab in System settings dialogue window;
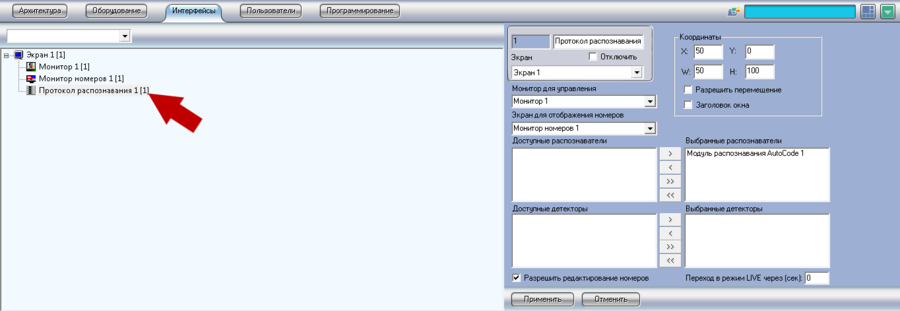
- Select Recognition Protocol that should be set up and click on it with left mouse button (See pic. Recognition Protocol. Interfaces tab in System settings dialogue window);
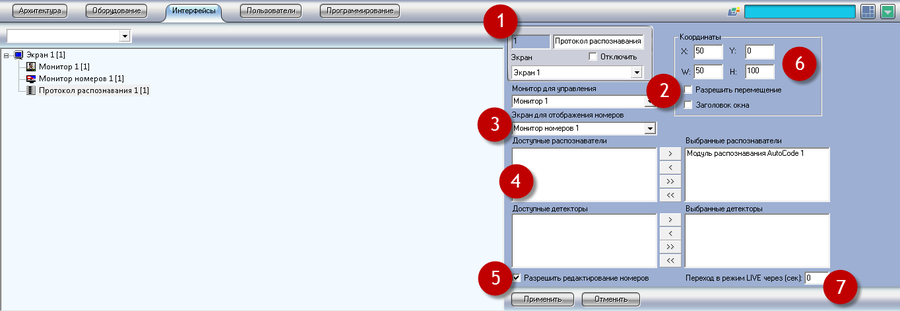
- Specify the required Recognition Protocol object parameters in the right part of system settings window (See pic. Recognition Protocol. Recognition Protocol object settings window):
- Object name –object name can be edited in this field;
- Screen – select desktop that should display the Recognition Protocol being created in the drop-down list;
- Coordinates – insert coordinates of Recognition Protocol object location coordinates on the screen in this set of fields:
- Х - upper-left corner coordinates of Recognition Protocol window horizontally;
- У - upper-left corner coordinates of Recognition Protocol window vertically;
- W - Recognition Protocol window width, specified in % from the size of working area;
- H - Recognition Protocol window height, specified in % from the size of working area;
- Allow Dragging – activation of this field allows operator to drag and scale Recognition Protocol window with mouse, directly on the working area. In case if this setting is not active, scaling or replacing of Recognition Protocol window is possible only in system settings;
- Window Name – activation of this option turns on displaying of Recognition Protocol window names specified in Object name on the working area;
- License plate displaying screen – select the License Plate Monitor in which information on the selected in Recognition Protocol event in the drop-down list. More detailed information on creation and configuring of License Plate Monitor is given in License Plate Monitor section;
- Control monitor – selection of monitor on which the shift to archive at double click on the event in Plate Protocol should be;
- Available and selected recognizers – transfer from Available recognizers to Selected Recognizer those recognition modules and AutoCode Event Collection Servers, events of which should be displayed in Plate Protocol being set up. In order to add recognition module or AutoCode Intellect event collection server to the Selected Recognizers, select it in the list of Available recognizers and click > button. To transfer all available recognition modules and AutoCode Intellect event collection servers click >> button. To cancel selection of one or several recognition modules and AutoCode Intellect Event Collection Servers, click < or << accordingly. More detailed information on AutoCode Intellect Recognition Module, its creation and setting up is given in AutoCode Intellect Recognition Module, on Event Collection Server – in Event Collection Server section;
- Available and Selected detectors – transfer from Available detectors list to Selected detectors list those external data bases thought which the control should be performed and information should be displayed in License plate Monitor window during the recognition of license plates. Select external data base and click > button to add it to Selected detectors. To transfer all available external data bases click >> button. To cancel selection of one or several external data bases click < or << accordingly. Guide on connection to external data base setting up is given in Connection of external data base to AutoCode Intellect Module section;
- License plate editing – activation of this option allows operator to configure and add license plates manually. In case this option is not active Add license plate and Edit license plate buttons in Recognition Protocol window are not available. More details about work with these buttons are given in Recognition Protocol Window section;
- Switch to LIVE in (sec) – allows to set time (in seconds) at which system goes to update, in case if operator does not perform any actions with selected in Recognition Protocol event. Default value is 0, which means that system will not switch to update mode automatically, that is event keeps being selected unless the deselection is made by operator.
- Click Apply.
Recognition Protocol object deletion and deactivation
Recognition Protocol object deactivation
- Open Interfaces tab in System settings dialogue window;
- Select Recognition Protocol object that should be deactivated and click on it with left mouse button (See pic. Recognition Protocol. Interfaces tab in System settings dialogue window);
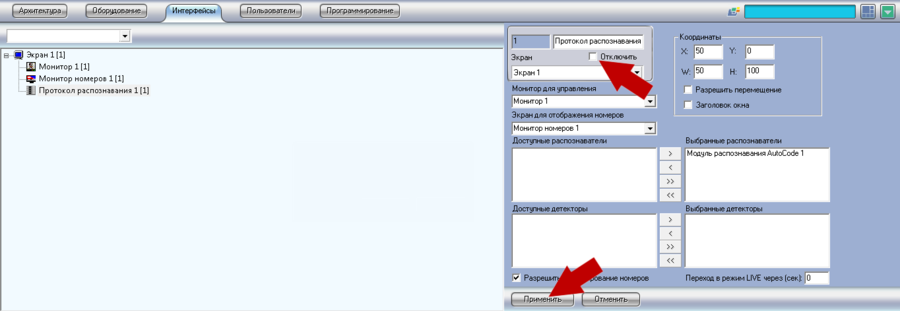
- Activate Deativate checkbox in the tight part of system settings window (See pic. Recognition Protocol. Recognition Protocol object deactivation);
- Click Apply.
Recognition Protocol object deletion
Perform the following actions to delete Recognition Protocol:
- Open Interfaces tab in System settings dialogue window;
- Select Recognition Protocol object that should be deleted and click on it with left mouse button (See pic. Recognition Protocol. Interfaces tab in System settings dialogue window);
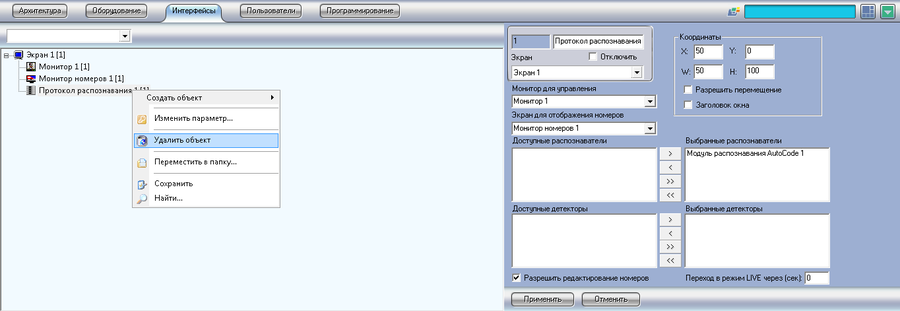
- Click on it with right mouse button and select Delete object in contextual menu (See pic. Recognition Protocol. Object contextual menu);
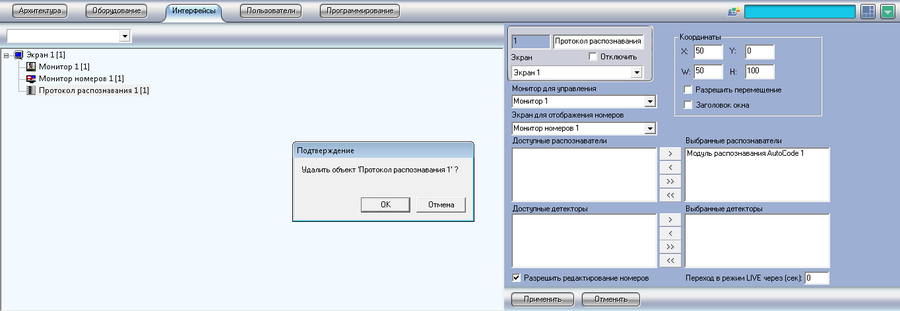
- Click OK in an appeared Confirmation dialogue window (See pic. Recognition Protocol. Object deletion confirmation dialogue window).
