Crystal configuration
Jump to navigation
Jump to search
The printable version is no longer supported and may have rendering errors. Please update your browser bookmarks and please use the default browser print function instead.
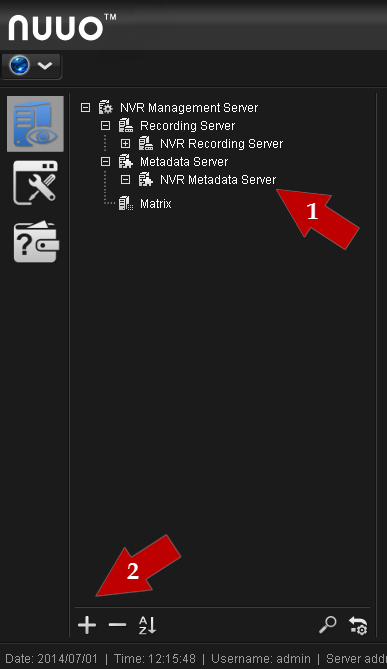
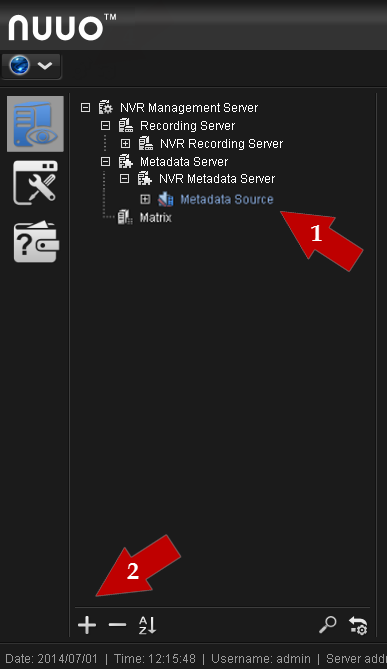
Setup 1. Create a new metadata source in Crystal System
- Step 1. Select NVR Metadata Server in the left part of Settings tab in NUUO Crystal NuClient application.
- Step 2. Click «+» in the bottom of tab.
- Step 3. Specify connection to AutoCode NUUO parameters in the right part of window:
- Name – name of new source, e.g. Metadata Source;
- Description – short description of source, e.g. Autocode;
- TCP Server IP – AutoCode NUUO address, where recognition will be performed;
- TCP Server Port – port specified as Server port in AutoCode NUUO settings;
- Step 4. Click Сommit Config button at the top of window to save configurations.
Setup 2. Create new metadata channel in Crystal System
- Step 1. Select metadata source created at the previous setup.
- Step 2. Click «+» at the bottom of the tab.
Step 3. Specify metadata channel parameters in Properties tab:
- Name – name of new channel, e.g. Metadata Channel;
- Description – short description of channel, e.g. Autocode;
Step 4. Click Сommit Config button at the top of window to save configurations.
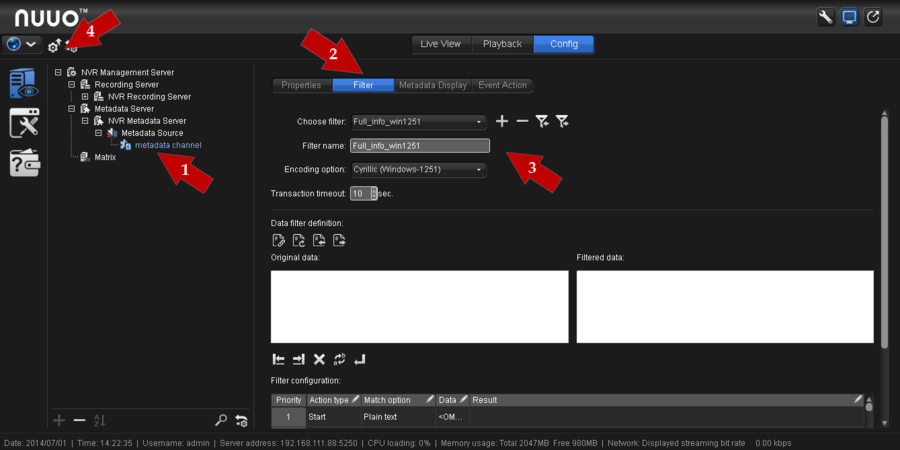
Setup 3. Specify filtering parameters in Crystal System
- Step 1. Select metadata channel created at setup 2.
- Step 2. On the upper panel select Filter tab.
- Step 3. Specify event filtering parameters:
- Choose filter – choose one of filters provided with AutoCode NUUO. If necessary filter is not available in the list, export it by clicking Export preliminarily;
- Filter name – paste filter name;
- Encoding option – choose encoding of received data. Filters provided with AutoCode NUUO contain encoding in the name of the file;
- Step 4. Click Сommit Config button at the top part of window to save configurations.
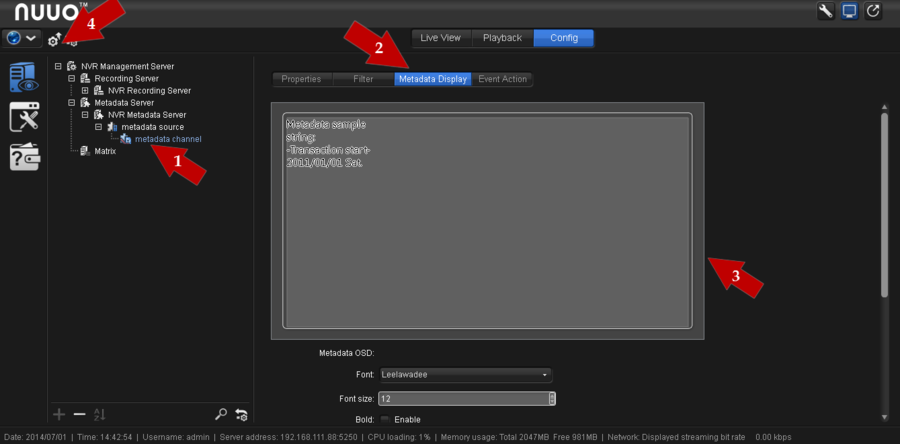
Setup 4. Specify metadata displaying parameters in Crystal System
- Step 1. Select metadata channel created at setup 2.
- Step 2. Select Metadata Display on the upper panel.
- Step 3. Specify event displaying parameters:
- font, its size and position of metadata in window with video;
- Associated Camera – select camera where data about recognized events should be displayed in Live View mode;
- Step 4. click Сommit Config button at the top part of window to save configurations.
Setup 5. Specify video parameters in AutoCode NUUO
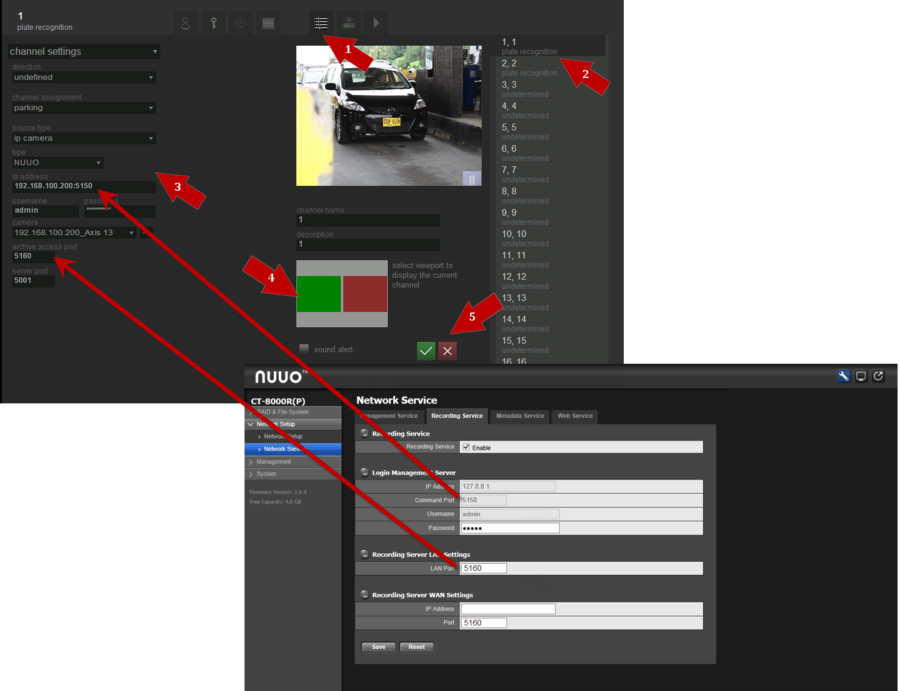
- Step 1. open the Settings tab in AutoCode NUUO and go to the Channel settings options there.
- Step 2. Select the channel that will receive video from Crystal System in the right part of the window.
- Step 3. Define the following channel parameters:
- Source type – Ip Camera;
- Type – NUUO;
- IP Address - the IP address of from Crystal System: Login Management Server (Command Port);
- Username and Password - the username and password of Crystal System;
- Camera – click on “…” button to connect to Crystal System and synchronize the camera list. After that select the Camera from the list appear;
- Archive Access Port - Recording Server LAN Settings (LAN Port);
- Step 4. Select the viewport to display this channel stream.
- Step 5. Save the settings.
Setup 6. Adjust LPR in AutoCode NUUO
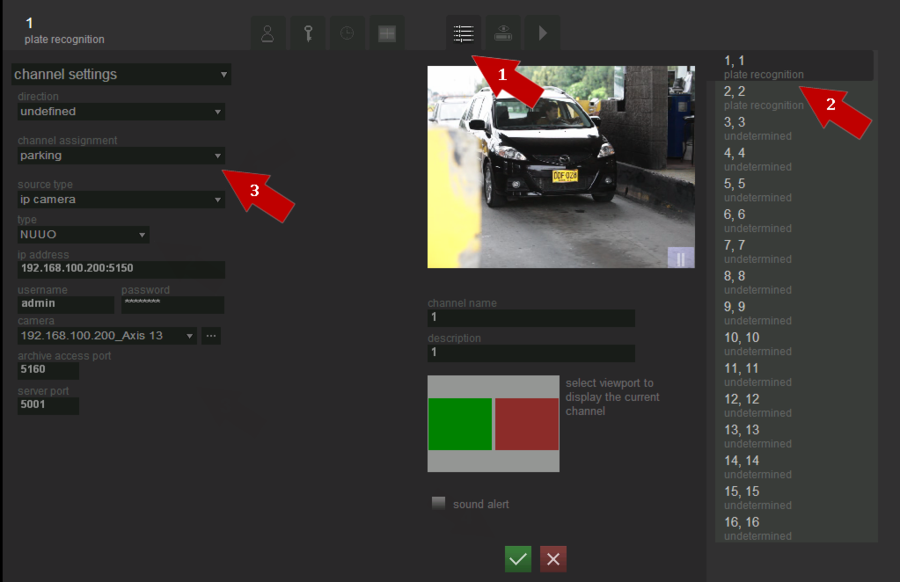
- Step 1. Open the Settings tab in AutoCode NUUO and go to the Channel settings options there.
- Step 2. Select the channel that will receive video from Crystal System in the right part of the window.
- Step 3. Select channel assignment as:
- Parking for AutoCode NUUO Parking;
- Demonstration or Flow for AutoCode NUUO Traffic.
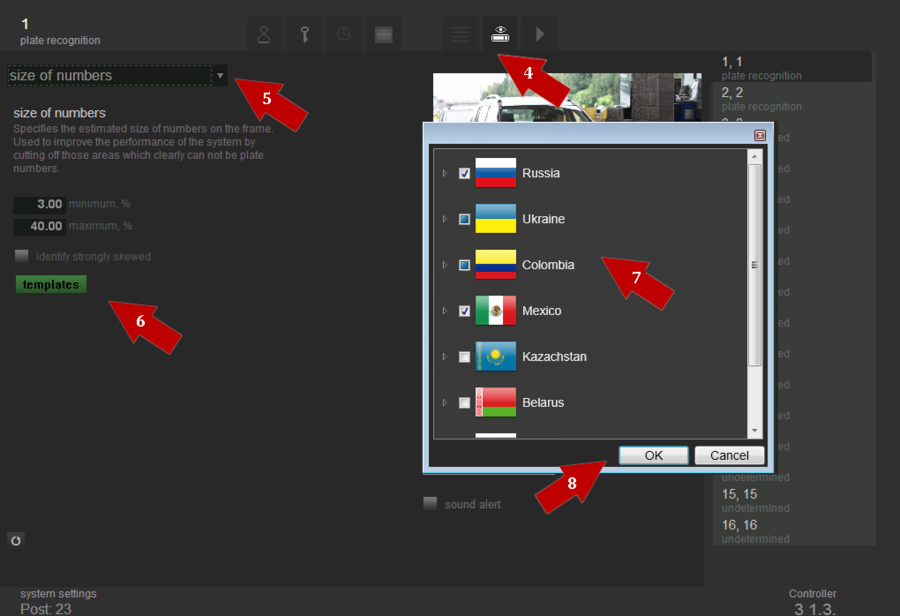
- Step 4. Go to the Recognition settings.
- Step 5. Select Size of numbers option in the menu.
- Step 6. Click on the Templates button.
- Step 7. Select your country.
- Step 8. Click Ok button to save the settings.
Setup 7. Specify metadata settings in AutoCode NUUO
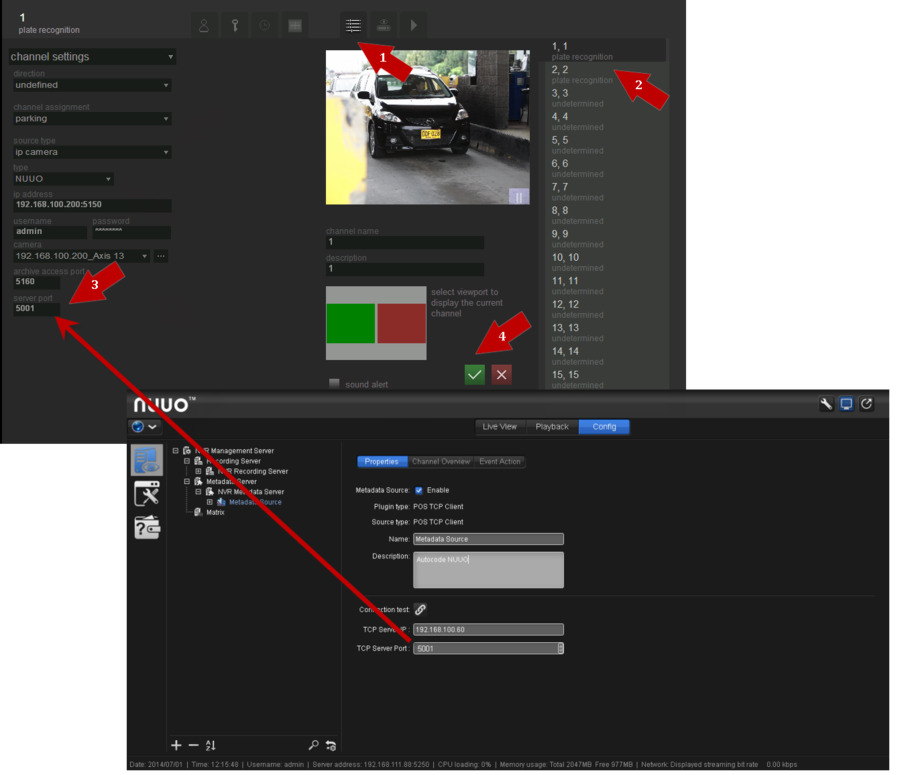
- Step 1. Open the Settings tab in AutoCode NUUO and go to the Channel settings options there.
- Step 2. Select the channel that receives video from Crystal System in the right part of the window.
- Step 3. Define Server Port - TCP Server Port entered at setup 1.
- Step 4. Save the settings.
Crystal configuration
Настройка системы_Crystal для работы с AutoCode
