Crystal configuration
Jump to navigation
Jump to search
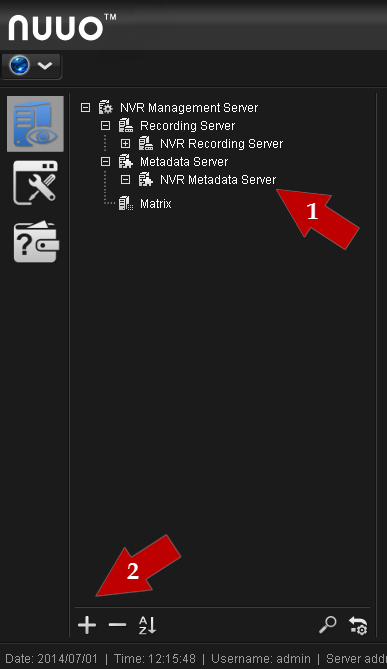
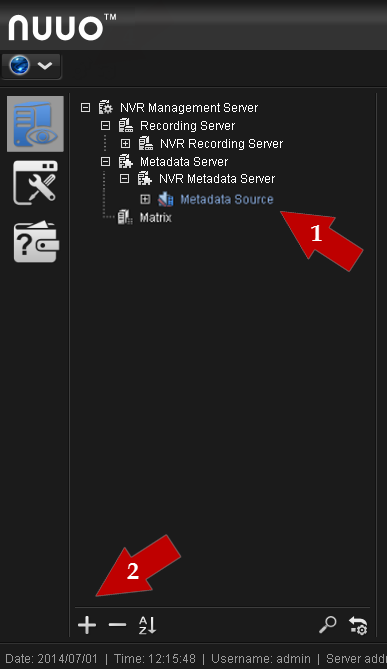
Setup 1. Create a new metadata source in Crystal System
- Step 1. Select NVR Metadata Server in the left part of Settings tab in NUUO Crystal NuClient application.
- Step 2. Click «+» in the bottom of tab.
- Step 3. Specify connection to AutoCode NUUO parameters in the right part of window:
- Name – name of new source, e.g. Metadata Source;
- Description – short description of source, e.g. Autocode;
- TCP Server IP – AutoCode NUUO address, where recognition will be performed;
- TCP Server Port – port specified as Server port in AutoCode NUUO settings;
- Step 4. Click Сommit Config button at the top of window to save configurations.
Setup 2. Create new metadata channel in Crystal System
- Step 1. Select metadata source created at the previous setup.
- Step 2. Click «+» at the bottom of the tab.
Step 3. Specify metadata channel parameters in Properties tab:
- Name – name of new channel, e.g. Metadata Channel;
- Description – short description of channel, e.g. Autocode;
Step 4. Click Сommit Config button at the top of window to save configurations.
Setup 3. Specify filtering parameters in Crystal System
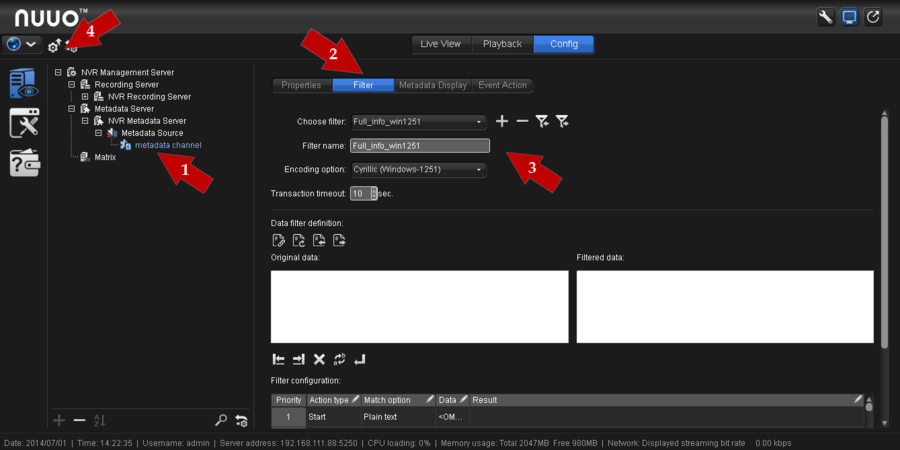
- Step 1. Select metadata channel created at setup 2.
- Step 2. On the upper panel select Filter tab.
- Step 3. Specify event filtering parameters:
- Choose filter – choose one of filters provided with AutoCode NUUO. If necessary filter is not available in the list, export it by clicking Export preliminarily;
- Filter name – paste filter name;
- Encoding option – choose encoding of received data. Filters provided with AutoCode NUUO contain encoding in the name of the file;
- Step 4. Click Сommit Config button at the top part of window to save configurations.
Setup 4. Specify metadata displaying parameters in Crystal System
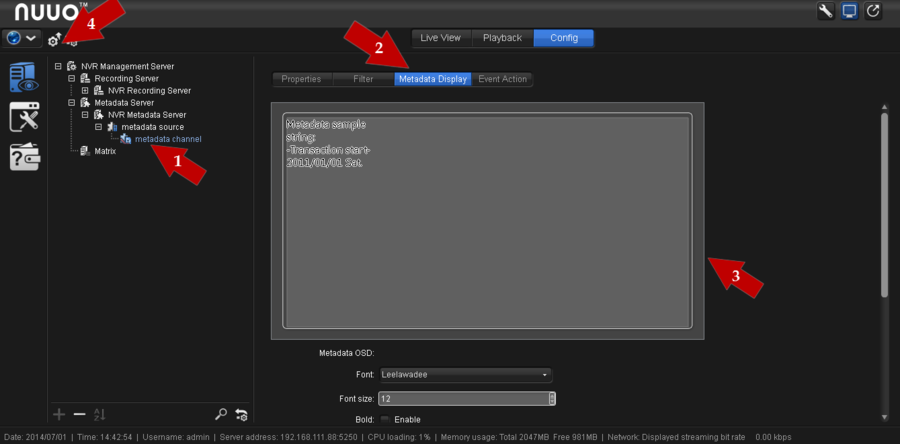
- Step 1. Select metadata channel created at setup 2.
- Step 2. Select Metadata Display on the upper panel.
- Step 3. Specify event displaying parameters:
- font, its size and position of metadata in window with video;
- Associated Camera – select camera where data about recognized events should be displayed in Live View mode;
- Step 4. click Сommit Config button at the top part of window to save configurations.
Setup 5. Specify video parameters in AutoCode NUUO
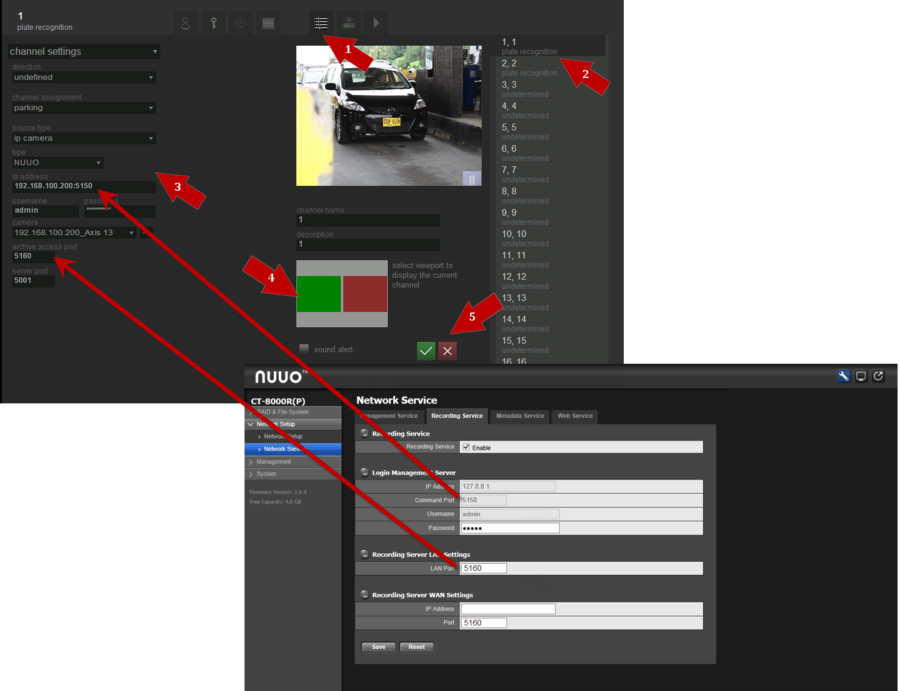
- Step 1. open the Settings tab in AutoCode NUUO and go to the Channel settings options there.
- Step 2. Select the channel that will receive video from Crystal System in the right part of the window.
- Step 3. Define the following channel parameters:
- Source type – Ip Camera;
- Type – NUUO;
- IP Address - the IP address of from Crystal System: Login Management Server (Command Port);
- Username and Password - the username and password of Crystal System;
- Camera – click on “…” button to connect to Crystal System and synchronize the camera list. After that select the Camera from the list appear;
- Archive Access Port - Recording Server LAN Settings (LAN Port);
- Step 4. Select the viewport to display this channel stream.
- Step 5. Save the settings.
Setup 6. Adjust LPR in AutoCode NUUO
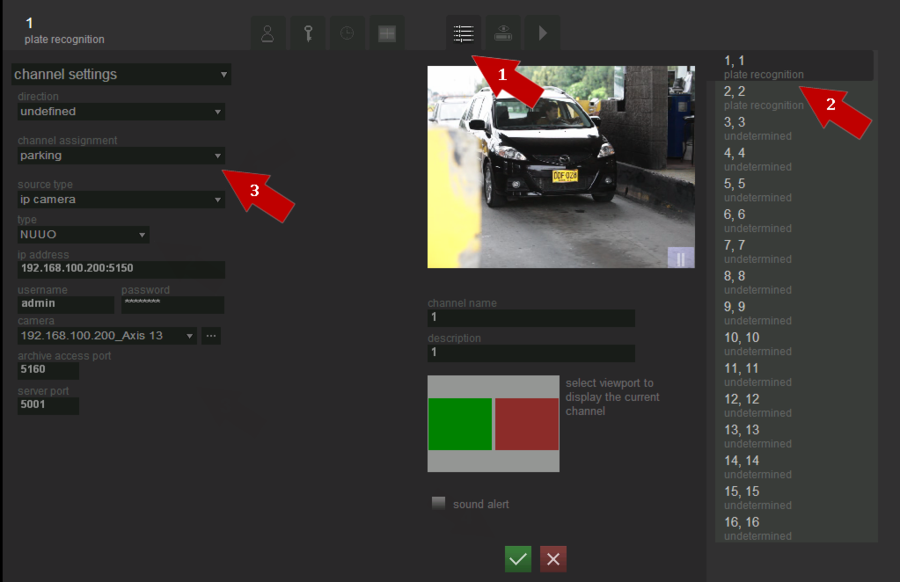
- Step 1. Open the Settings tab in AutoCode NUUO and go to the Channel settings options there.
- Step 2. Select the channel that will receive video from Crystal System in the right part of the window.
- Step 3. Select channel assignment as:
- Parking for AutoCode NUUO Parking;
- Demonstration or Flow for AutoCode NUUO Traffic.
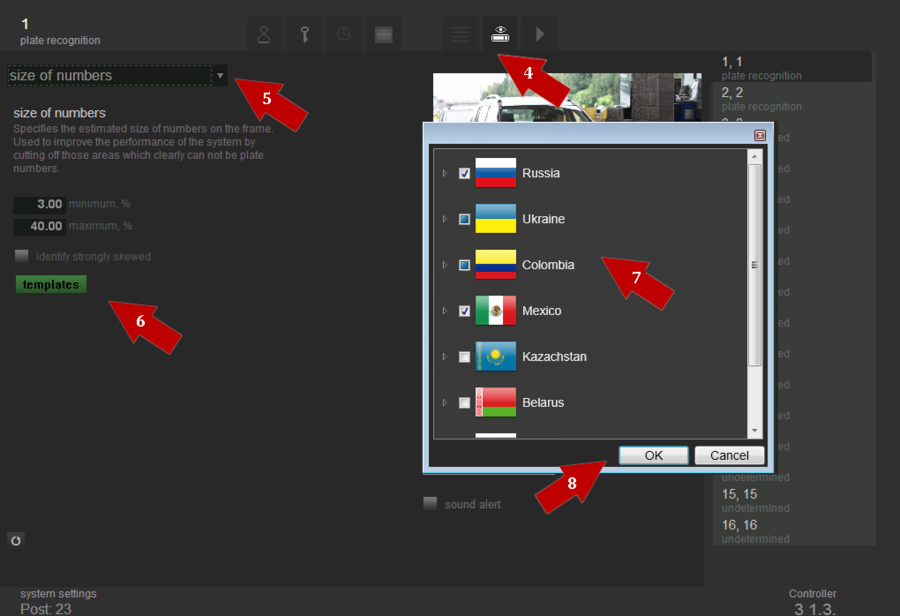
- Step 4. Go to the Recognition settings.
- Step 5. Select Size of numbers option in the menu.
- Step 6. Click on the Templates button.
- Step 7. Select your country.
- Step 8. Click Ok button to save the settings.
Setup 7. Specify metadata settings in AutoCode NUUO
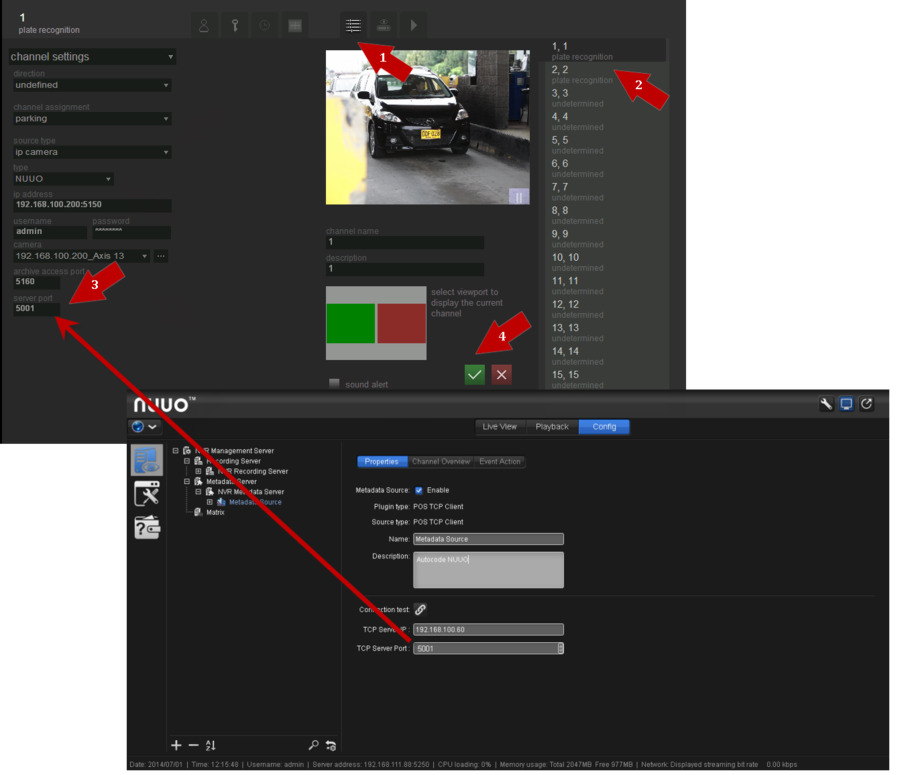
- Step 1. Open the Settings tab in AutoCode NUUO and go to the Channel settings options there.
- Step 2. Select the channel that receives video from Crystal System in the right part of the window.
- Step 3. Define Server Port - TCP Server Port entered at setup 1.
- Step 4. Save the settings.
Crystal configuration
Настройка системы_Crystal для работы с AutoCode
