Viewer for Smart Client
Authorization in Milestone Smart Client
It's necessary to sign in Milestone Smart Client, before start working.
To sign in the one should perform the following steps:
- 1. run the Milestone Smart Client;
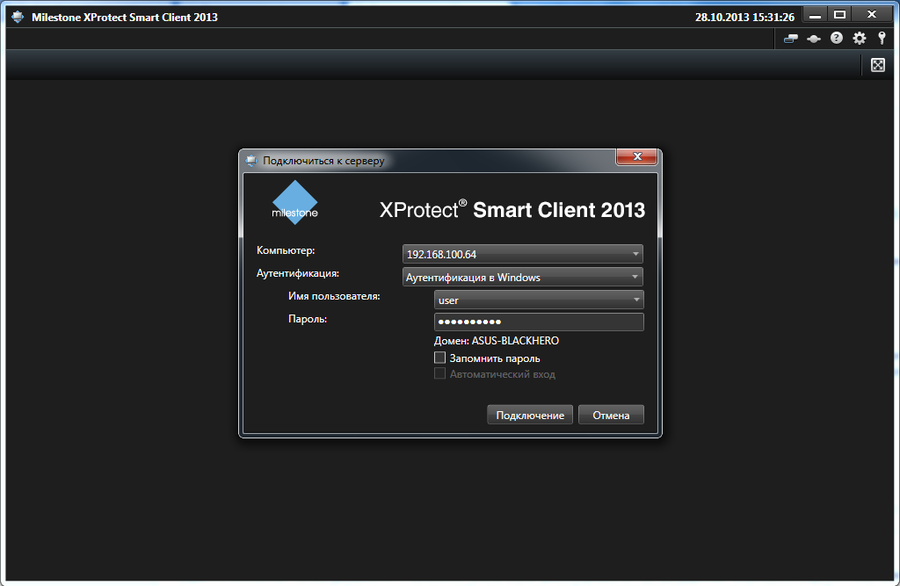
- 2. enter the required data in the dialog box Connect to the server (see. fig. Viewer for Smart Client. Authorization window):
- 2.1. Computer - enter the IP-address of the server;
- 2.2. Authentication - it's necessary to select authentication type:
- 2.2.1. Windows authentication (current user) - authorization at XProtect server with parameters of the current Windows user;
- 2.2.2. Windows;
- 2.2.3. Basic ;
- 2.3. User name - login that is used for connection to the XProtect server;
- 2.4. Password - password that is used for connection to the XProtect server;
- 2.5. Remember password - enable this checkbox if it's necessary to save the user authorization data;
- 2.6. Auto-login - enable this checkbox to sign in with current user's data in the future;
- 3. click the Connect button.
Milestone Smart Client Customization
To customize the Milestone Smart Client the following steps should be performed:
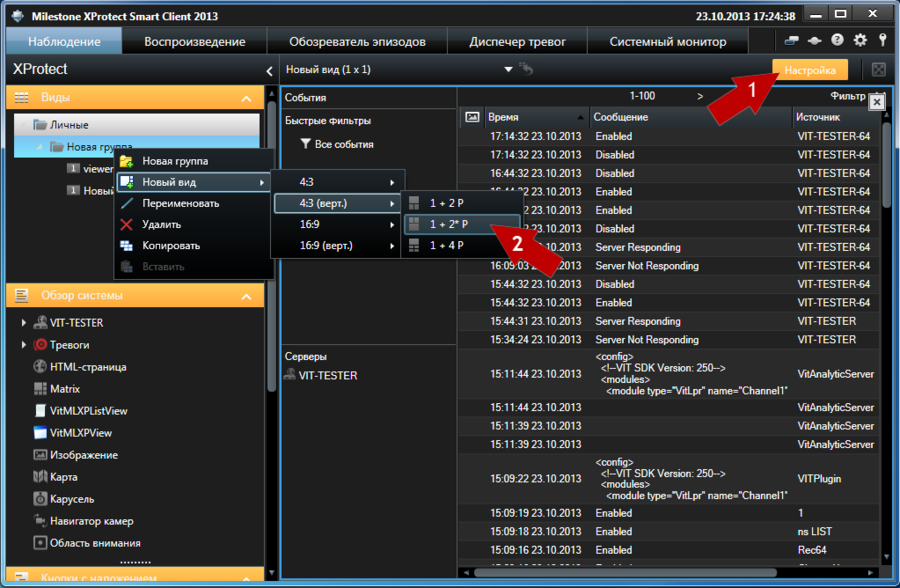
- switch to the customization mode in the Milestone Smart Client – click the Setup button on the control panel;
- double click with right mouse button on the option Shared in the section Views that is in left part of the application, select option New View in the context menu that appears and define new view parameters: number of panels and their location (see. fig. Viewer for Smart Client. New view creation));
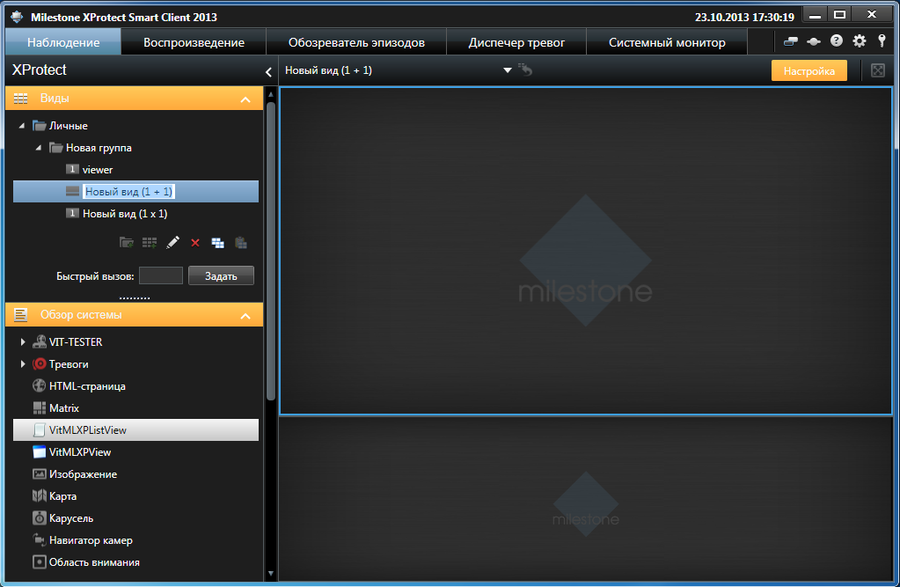
- paste new view's name (see. fig. Viewer for Smart Client. New name creation);
- click the Setup button to switch back to the live mode.
Displaying recognition results in the Milestone Smart Client
To customize displaying recognition results in the Milestone Smart Client it's necessary to perform the following actions:
- switch to the customization mode in the Milestone Smart Client – click the Setup button on the control panel;
- in the section Views select the view for configuration;
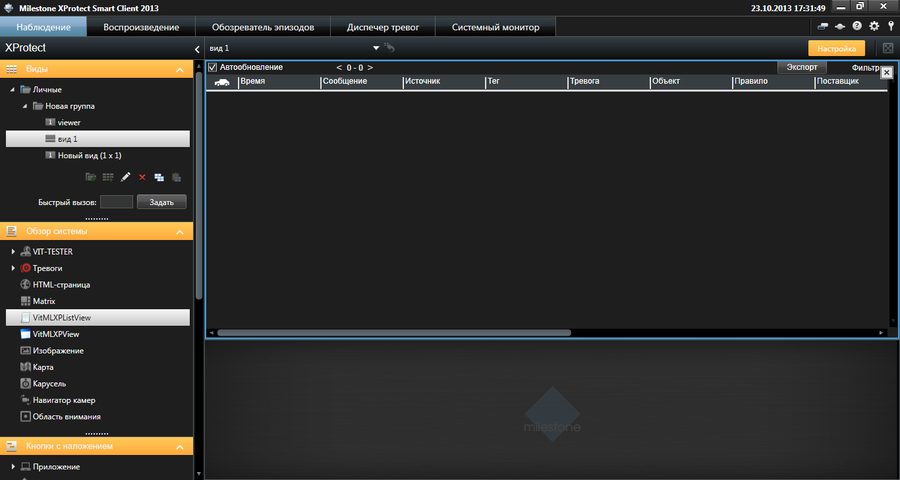
- select option VitMLXPListView in the section System Overview that is in left part of the application, drag and drop it to the workspace in the right part of the application (see fig. Viewer for Smart Client. Adding Viewer to the workspace);
- click the Setup button to switch back to the live mode..
Operations with Viewer for Milestone
Events list
To see the events it's necessary to perform the following steps:
- 1. open Live tab in the Milestone Smart Client;
- 2. select the view were the events will be displayed in the the section Views that is in left part of the application;
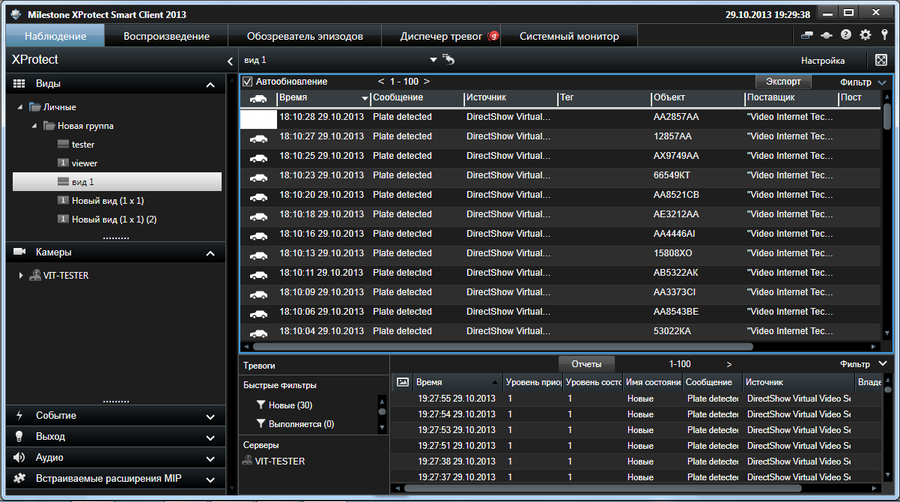
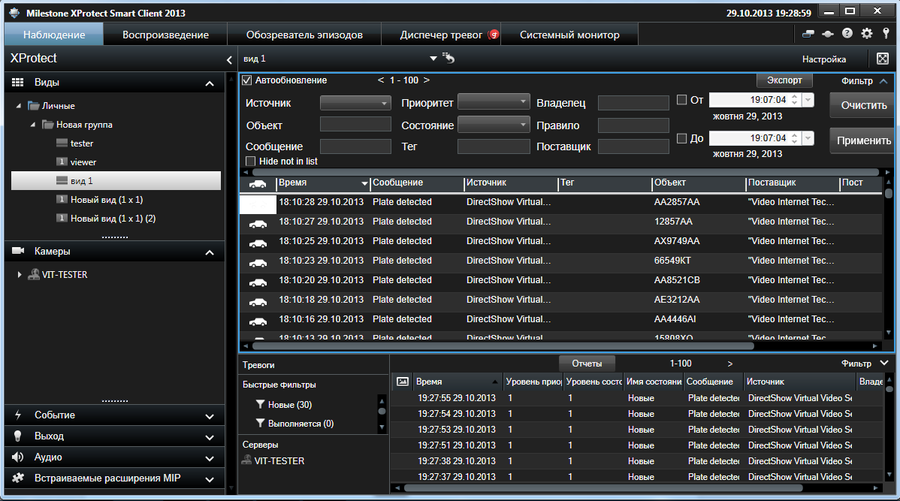
- 3. table with events will be displayed in the right part of the application (see fig. Viewer for Smart Client. Events list):
- 3.1. Time - a column that displays the time of license plate recognition in the format HH.Min.SS DD.MM.YYYY;
- 3.2. Message - message that defines the event type, for example Plate lost, Plate detected, List, etc.;
- 3.3. Source Name - name of source in Milestone system (camera, server) where event happened;
- 3.4. Tag;
- 3.5. LocalId - link on the alarm connected to the event;
- 3.6. Object Value - license plate number;
- 3.7. Rule Type - rule for alarm;
- 3.8. Vendor name - vendor name;
- 3.9. Owner - the one to whom the alarm is assigned;
- 3.10. Priority - number of the alarm's priority;
- 3.11. Priority name - name of the alarm's priority;
- 3.12. State - number of the alarm's state;
- 3.13. State name - name of the alarm's state;
- 3.14. Post - post number where the license plate number was recognized;
- 3.15. Speed - speed of the vehicle at the moment of the event fixation.
Events order
To order the events it's necessary to perform the following steps:
- 1. open Live tab in the Milestone Smart Client;
- 2. select the column in the events table by which data should be ordered;
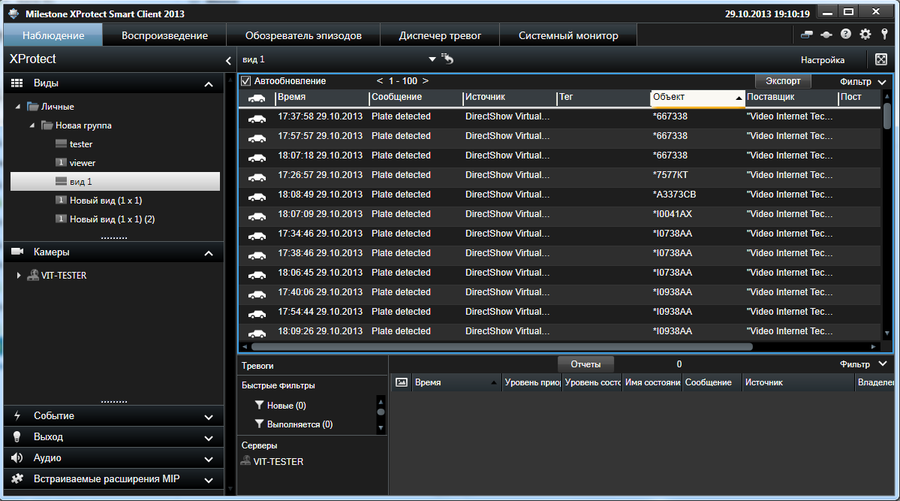
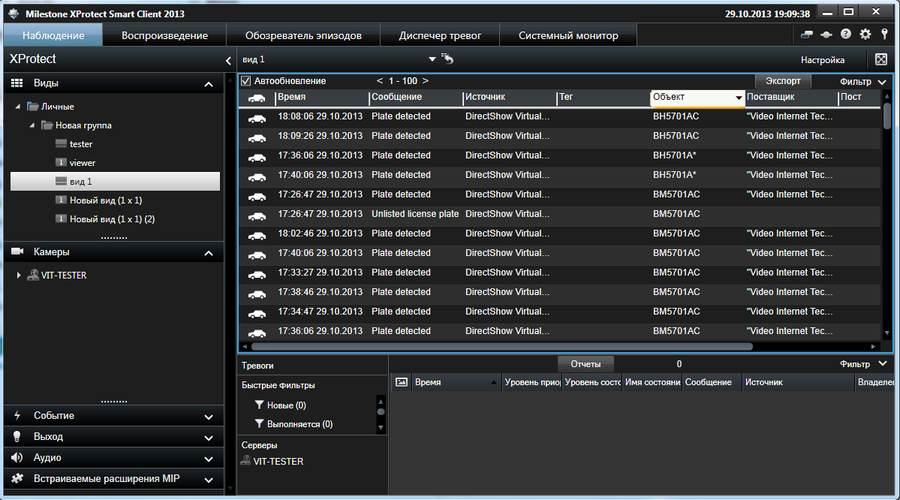
- 3. click with left mouse button on the columns name. The icon that shows order of the events will appear:
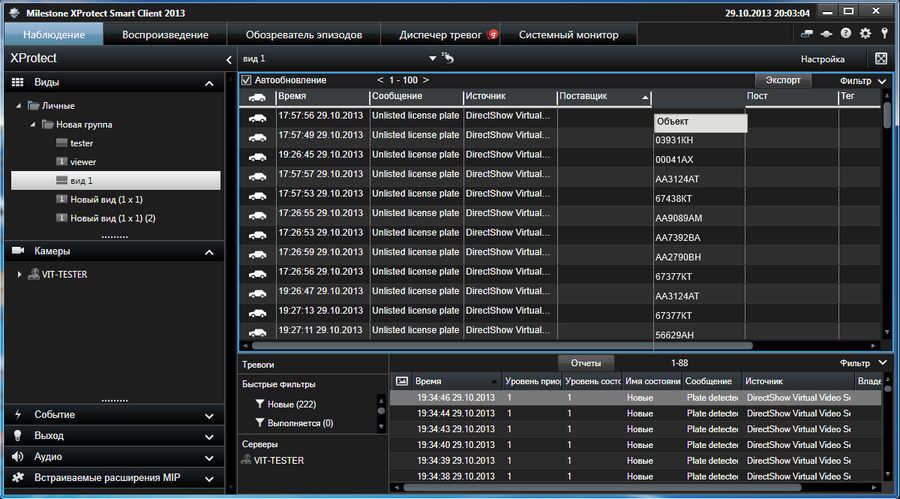
- 3.1. in ascending order (for example, for column Object - see fig. Viewer for Smart Client. Ascending order of the events);
- 3.2. in descending order (for example, for column Object - see fig. Viewer for Smart Client. Descending order of the events);
- 4. to change the order of the events organization it's necessary to click on the column's name one more time.
Attention!
Events organization can be done only by one column in the same time period. The icon that shows order of the events organization is shown only for that column. After the selection of the another column, icon will be shown near its header. By default events are ordered by Time.
Events filtration
To filter the events it's necessary to perform the following steps:
- 1. open Live tab in the Milestone Smart Client;
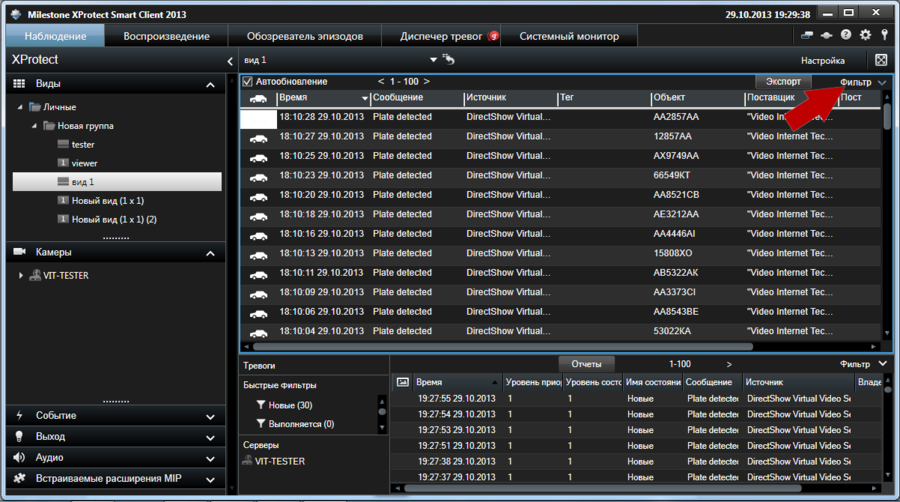
- 2. click on the Filter button at the control panel to open Filters panel (see fig. Viewer for Smart Client. Filters panel);
- 3. paste filtration parameters ( см. рис. Viewer for Smart Client. Filtration parameters);
- 4. click the Apply button. If several filtration parameters are pasted only events that meet them all will be shown.
Export and Special export
To export the events it's necessary to perform the following steps:
- open Live tab in the Milestone Smart Client;
- click on the Export button at the control panel;
- select tab Export in the window that appears;
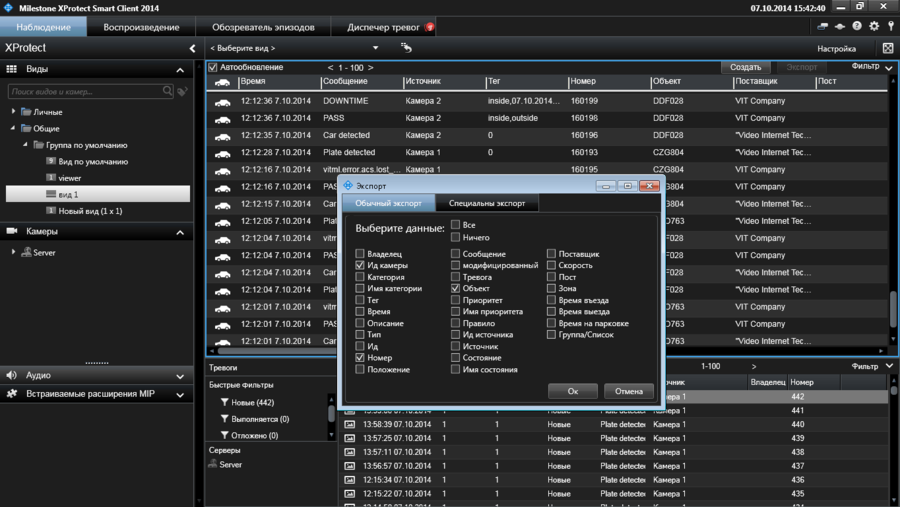
- select data for export by checking the boxes with corresponding names (see fig. Viewer for Smart Client. Export window). Click the Ок button;
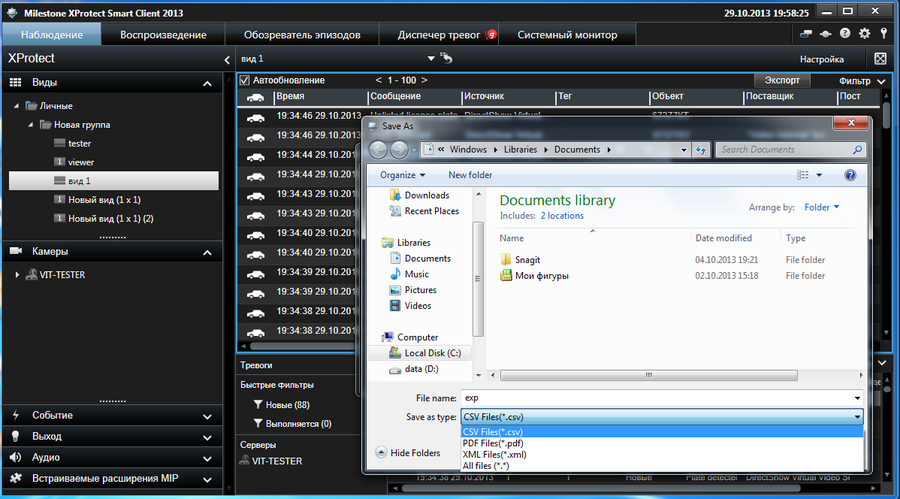
- select the folder for exported files in the Save as window (see fig. Viewer for Smart Client. Save as window). Paste exported file's name in the File name' field and select future file's type at the Save as type list:
- csv;
- pdf;
- xml;
- click the Save button.
Attention!
If no filters applied all events will be exported.
Special export is used for creation of the report with vehicles that are on the parking list. Report contains the following data:
- vehicle's license plate number;
- time of entrance at the parking;
- time of the parking duration.
To create the report it's necessary to perform the following steps:
- open Live tab in the Milestone Smart Client;
- click on the Export button at the control panel;
- select tab Special Export in the window that appears;
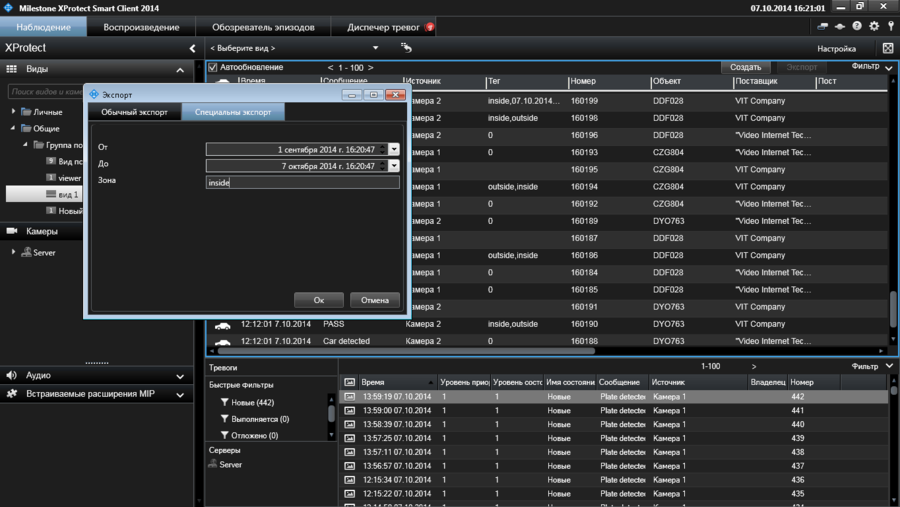
- paste time and zone (parking) for which the report should be created (see fig. Viewer for Smart Client. Special Export window). Click the Ок button;
- select the folder for exported files in the Save as window (see fig. Viewer for Smart Client. Save as window). Paste exported file's name in the File name' field and select future file's type at the Save as type list:
- csv;
- pdf;
- xml;
- click the Save button.
Event's details
To see the event's details it's necessary to perform the following steps:
- open Live tab in the Milestone Smart Client;
- select the event in the events table which details should be shown;
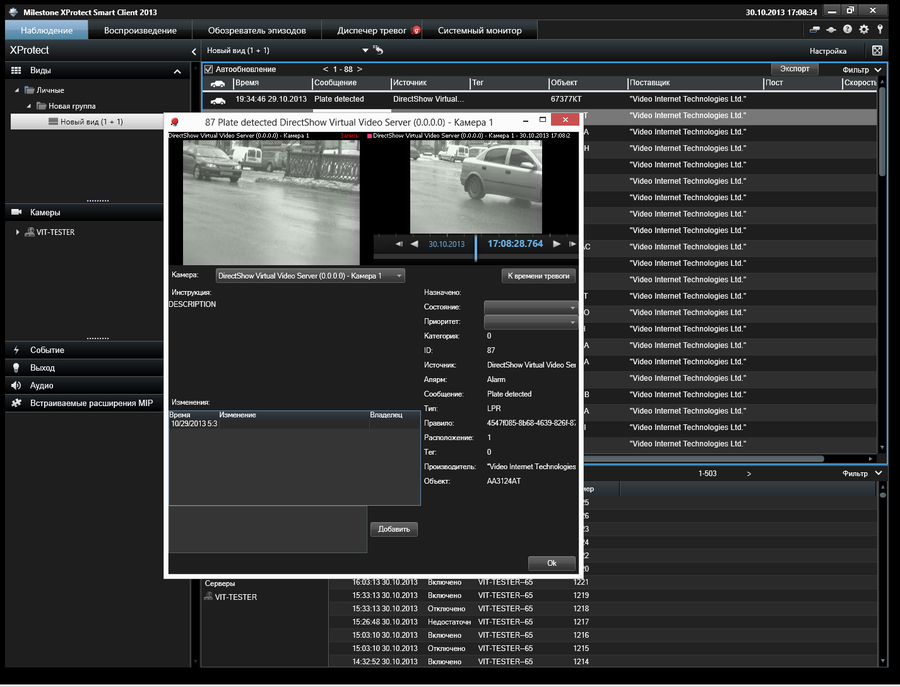
- double click with the left mouse button on the selected event (see fig. Viewer for Smart Client. Event's details).
Number of columns to display changing
To change the number of columns to display it's necessary to perform the following steps:
- open Live tab in the Milestone Smart Client;
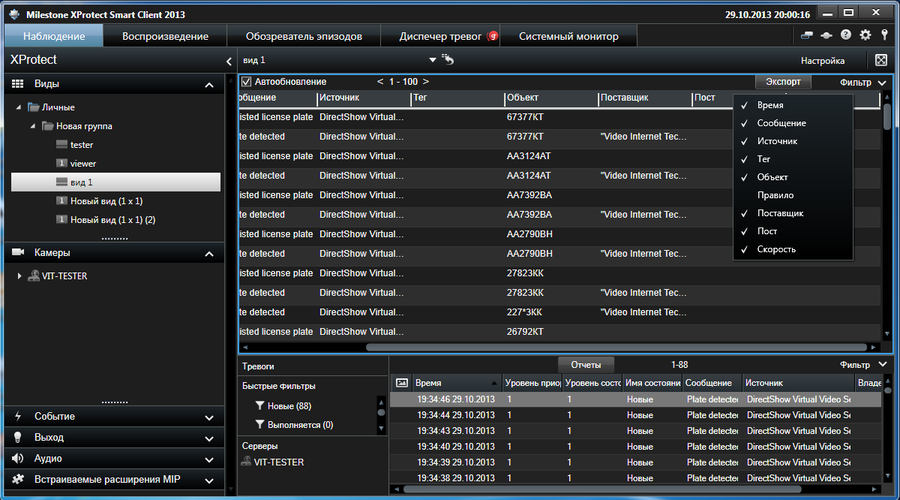
- click with right mouse button on the header of the events table - menu with list of all available columns will be shown (see fig. Viewer for Smart Client. Menu with list of all available columns ). Columns that are currently displaying are marked by flag;
- click with left mouse button on columns name in the list to add (add flag) or remove (remove flag) it from the displaying.
Order of columns to display changing
To change the order of columns to display it's necessary to perform the following steps:
- open Live tab in the Milestone Smart Client;
- select the column of the events table that should me moved;
- click with left mouse button on the header of the selected column and drag-and-drop it to the correct place (see fig. Viewer for Smart Client. Order of columns to display changing ).
Size of columns to display changing
To change the size of columns to display it's necessary to perform the following steps:
- open Live tab in the Milestone Smart Client;
- select the column of the events table that should me resized;
- move the columns header border by left mouse button.
Events editing
Edit the event means to change the license plate number that was recognized.
To edit the event it's necessary to perform the following steps:
- open Live tab in the Milestone Smart Client;
- select the event in the events table which should be edited;
- click with left mouse button in the Object column and edit license plate number;
- click the Enter button.
After the editing the event will be saved with Plate corrected message in the Message column.
Events creation
To create the event means to add the info about the license plate number recognition manually.
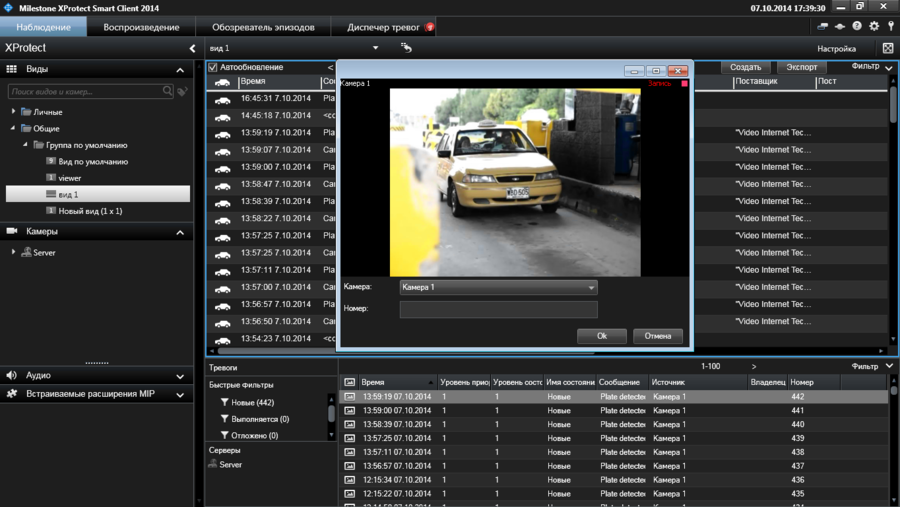
To create the event it's necessary to perform the following steps (see fig. Viewer for Smart Client. Event creation ):
- open Live tab in the Milestone Smart Client;
- click the Create button on the control panel;
- select the camera that should be connected with the event and paste the license plate number in the 'Number' filed;
- click the Ok button.
Event will be saved with Plate added message in the Message column.
