Target Servers, Enterprise version
Target Servers Management
After the installation, VIT Recognition Server is available for future configuration in Milestone Management Application, Surveillance Server – Advanced Configuration - MIP Plug-ins – VIT Analytic Service section. No additional software is required for VIT Recognition Server management.
List of Target Serves is available in Target Servers section of Milestone Management Application property tree.
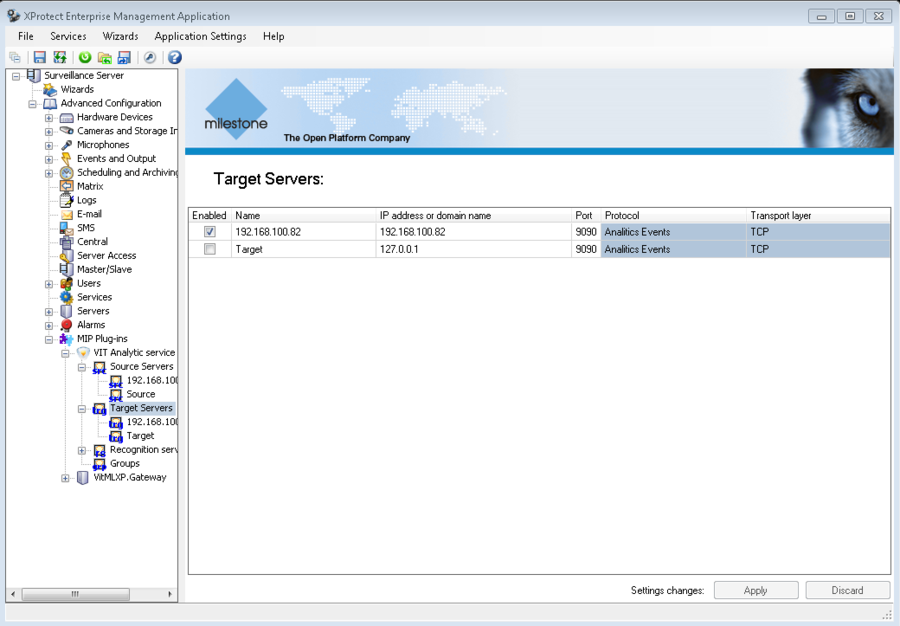
To see all target servers, available in the system, it is necessary to select Target Servers section. After that table with list of all target servers will be shown at the right part of the application (see fig. Target Servers. List of all available servers).
Table columns properties:
- Enabled – checked field shows, if the server can be used;
- Name – target server’s name;
- IP address or domain name – ip-address or a domain name of the computer with Event server;
- Port – connection port;
- Protocol – protocol according to which recognition events are sent;
- Transport Protocol – transport protocol for network.
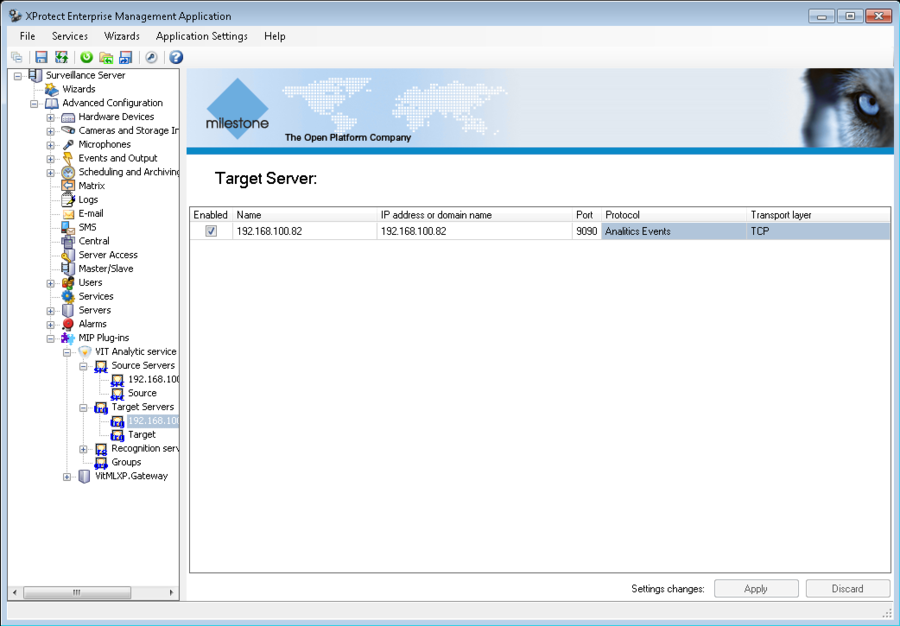
To get information about some specific server it is necessary to select its name in the servers list. After that table with information about selected server will be shown at the right part of the application (see fig. Target Servers. Information about selected server).
New Target Server Creation
To create a new Target server it is necessary to perform the following steps:
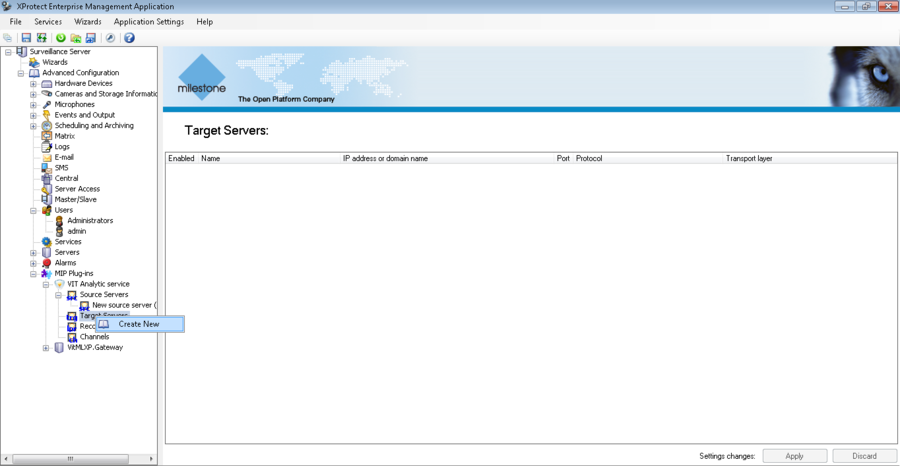
- click with right mouse button on the Target Servers section and select Create New in the context menu (see fig. Target Servers. New Target Server Creation);
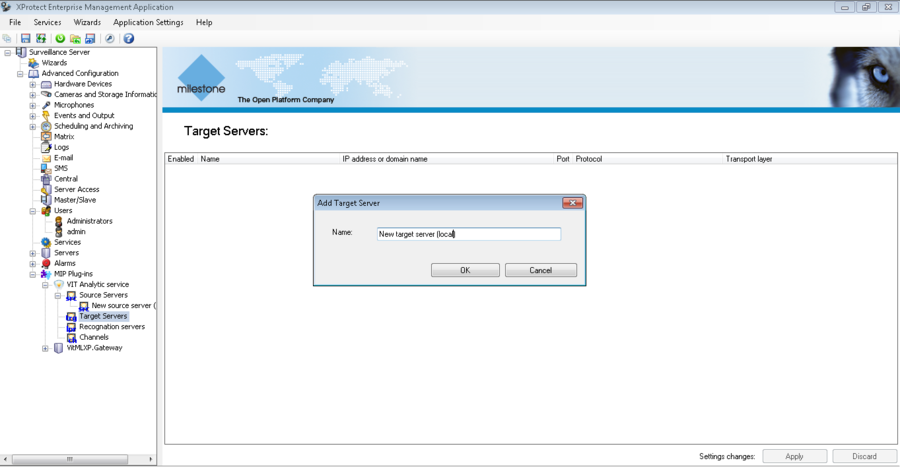
- paste the server’s name in the pop-up window and press the OK button (see fig. Target Servers. Server naming).
At this point new Target server is created. It is available for future management in the servers list.
Target Server Configuration
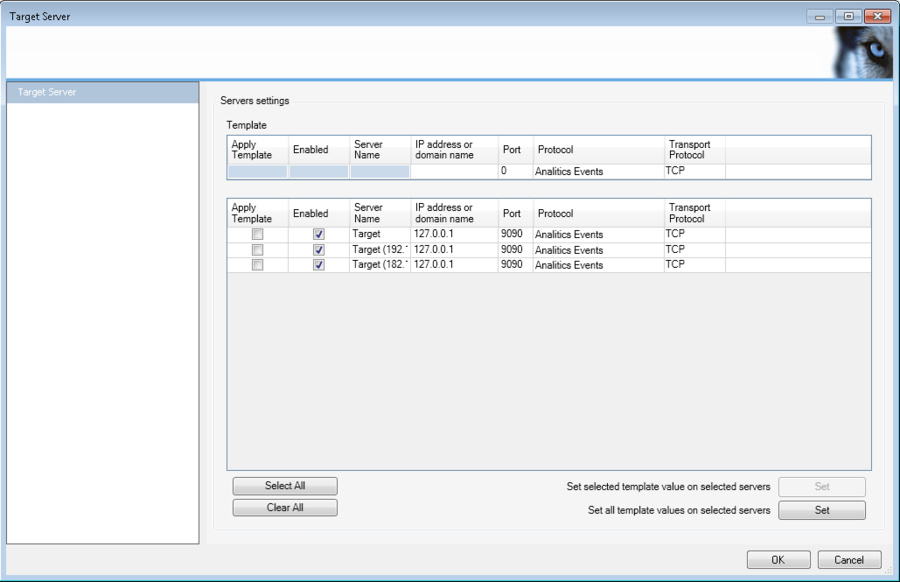
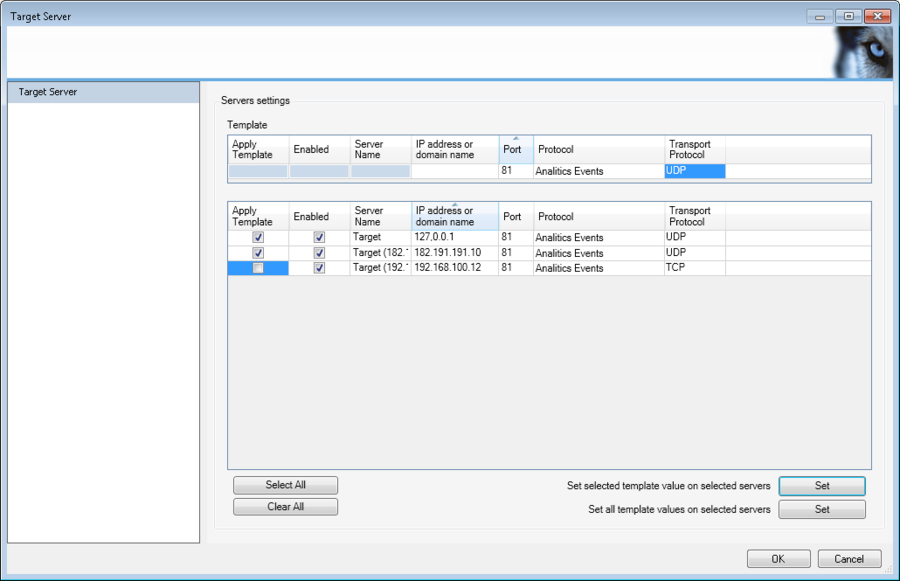
To configure Target server’s parameters it is necessary to double click on the specific row at the servers table. After that pop-up window with server’s parameters that are available for editing, will be shown (see fig. Target Servers. Target Server’s parameters window).
Template – it's a value of a specified parameter or values of a set of parameters which will be applied to all servers, selected in servers table.
Table columns properties:
- Apply Template – flag in this field defines if the template will be applied to the selected server;
- Enabled – flag in this field defines if the server available for usage;
- Server Name – name of the Target server;
- IP address or domain name – ip-address or a domain name of the computer with Event server If Event server is on the one computer with Management Application than ip-address of that computer must be pasted. «127.0.0.1» or «localhost» can be pasted only if just one Analytic server is used and it’ on the same computer with Recording server and Management Application;
- Port – connection port;
- Protocol – protocol according to which recognition events are sent;
- Transport Protocol – transport protocol for network.
Target Server Deletion
To delete existing Target server it is necessary to perform the following steps:
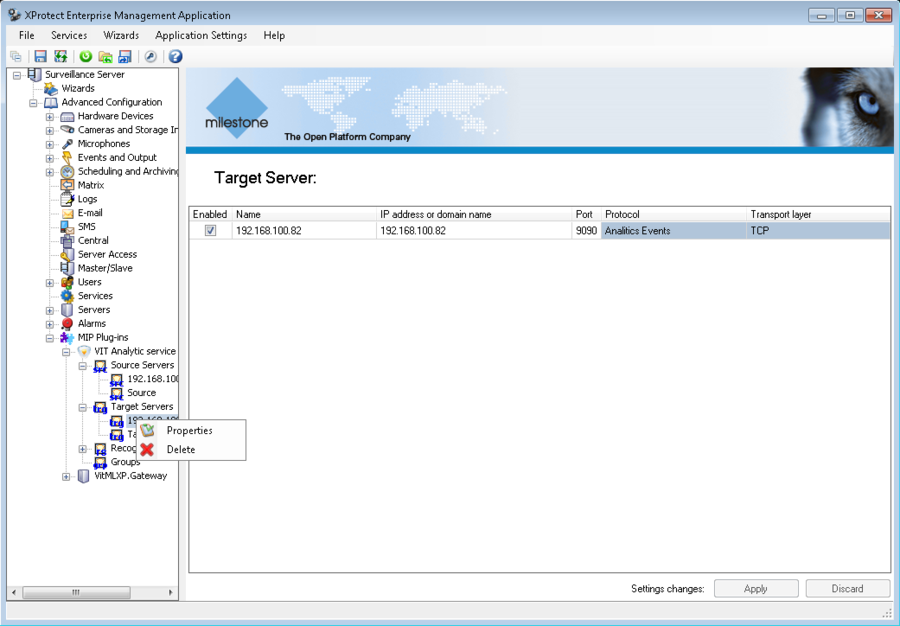
- click with right mouse button on the name of the specified Target server and select Delete in the context menu (see fig. Target Servers. Target server deletion);
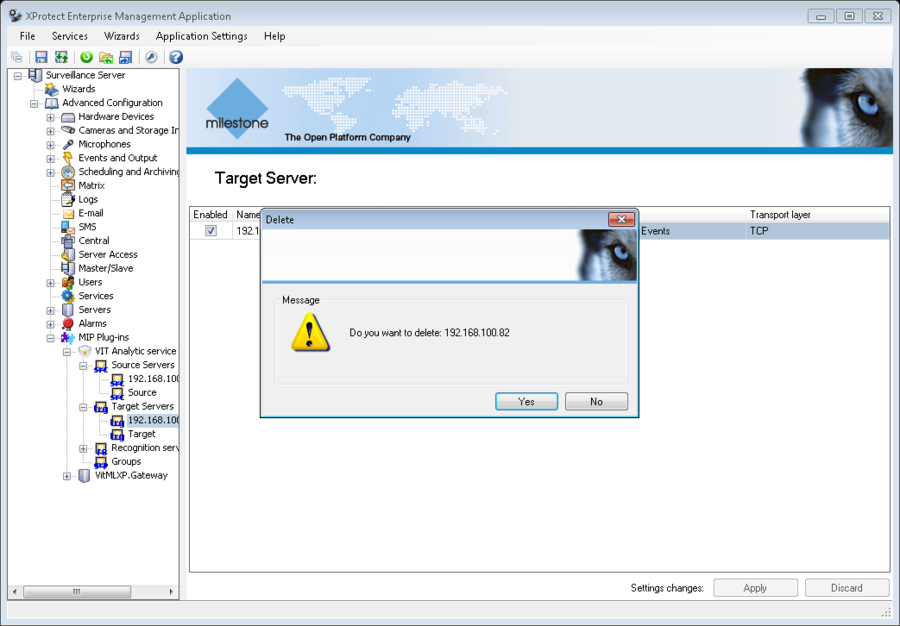
- confirm deletion in the pop-up window (see fig. Target Servers. Confirmation of deletion).
Operations with Templates
Templates are provided to simplify the Target servers management.
Template – it's a value of a specified parameter or values of a set of parameters which will be applied to all selected servers. Template usage is recommended in a situation when the number of servers with the same parameter or parameters must be configured.
To use a template, it is necessary to perform the following steps:
- double click on the server’s name or its settings to open Target Server window;
- paste server(s) parameters to the Template table;
- enable Apply template option for that servers, which it is necessary to apply the parameters, specified at step 2;
- press the Set button:
- Set selected template value on selected servers – only active value from the Template table (cell is framed or highlighted) will be applied to the servers specified at the step 3;
- Set all template values on selected servers - all values from the Template table will be applied to servers specified at step 3.
Example
There are three target servers in a system. Connection and protocol parameters must be defined for them. Default parameters are (see fig. Target Servers. Default parameters):
- IP address or domain name – 127.0.0.1;
- Port – 9090;
- Protocol – Analytics Events;
- Transport Protocol – TCP.
Next, connection and protocol parameters must be set:
- Port for all servers – 81;
- Transport Protocol for the first and the second servers – UDP.
Possible configuration with use of templates is described below.
Step 1
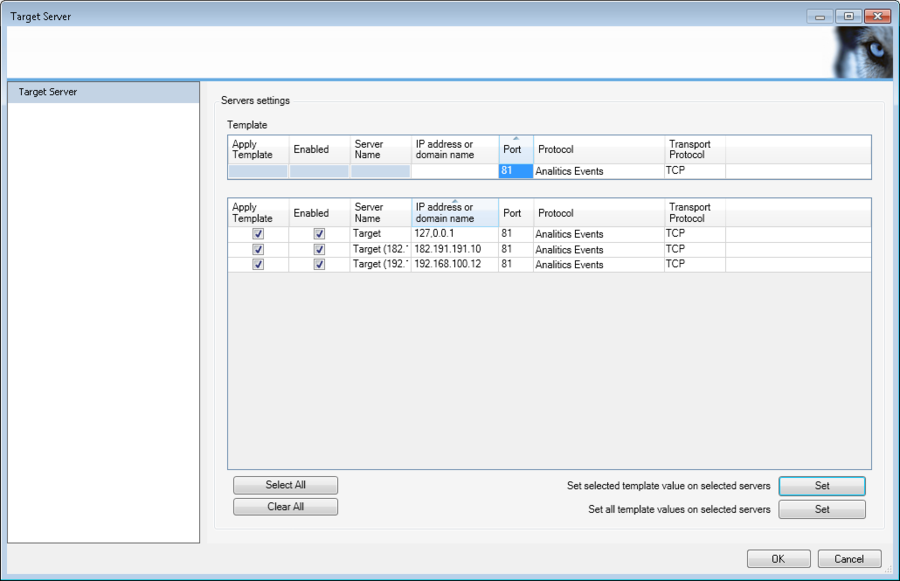
- enter 81 for Port in the Template table;
- in servers table enable Apply template option for all servers;
- press the Set button for Set selected template value on selected servers option;
The result of the step 1 is shown in the figure Target Servers. Step 1 of configuration, using template.
Step 2
- enter UDP for Transport Protocol in the Template table.
- in servers table disable Apply template option for the third server;
- press the Set button for Set selected template value on selected servers option;
The result of the step 2 is shown in the figure Target Servers. Step 2 of configuration, using template.
Target server(s) configuration is finished.
Target Servers, Enterprise version Сервера Назначения, версия Enterprise
